
GlitterIDE is a desktop app that opperates through a single window interface. It is inspired by the Scratch coding environment.
When you first run Glitter you will see the basic layoug with no project loaded. You may first see a not asking you to accept the conditions for use - if so, read the text, and then scroll down click the button to accept. You can prevent this message from appearing each time Glitter is run, by unchecking the appropriate option in the Preferences (to select the Preferences, click on "Prefs" in the list on the left.
The main window is made up of multiple parts. They are:
To create your first project, click on the "File" menu and choose "New App Project". Doing so should create a new project in the Project View, giving a display like as follows:
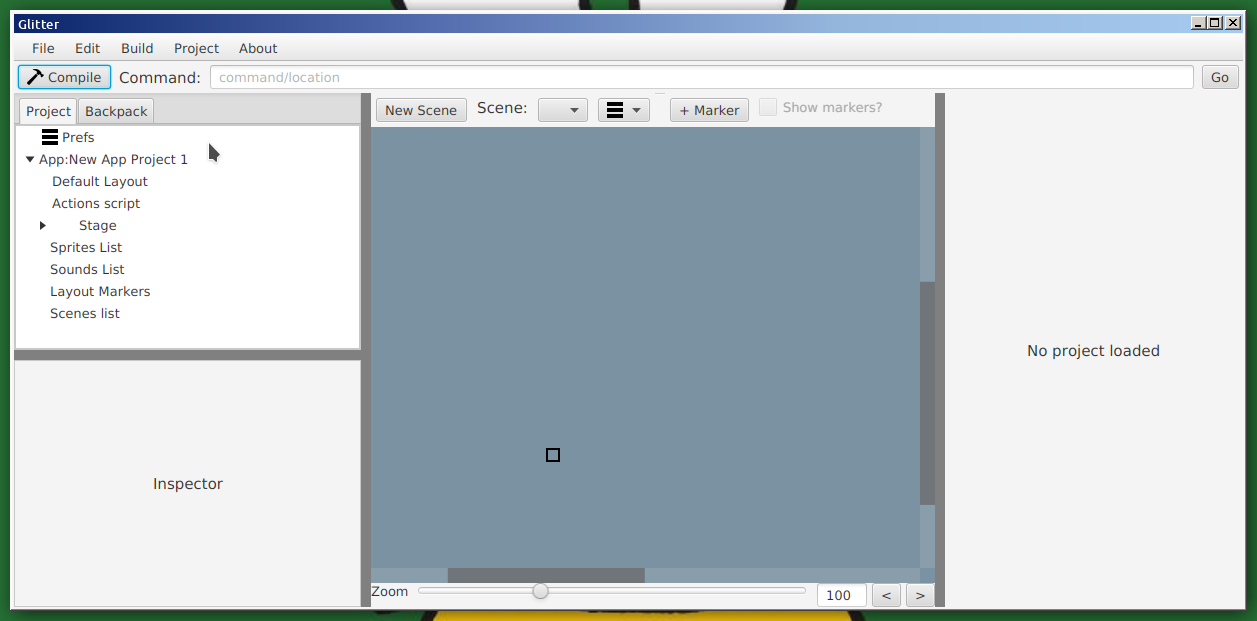
Yeah, it still says no project loaded. Click on one of the items in the Project View tree will change the Main Area. You can see that your new App Project now has the following nodes. These include:
To create a new sprite, click on Sprite List in the Project View. The "All sprite list" will show in the Main Area. Click on the button marked "New" (with a paint brush icon). This should create a blank "Sprite 0", which will show in the Sprite List in the Project View, and in the Sprite List in the Main Area.
![]()
To edit the image of the sprite click on Costumes in the Sprite List for Sprite 0. Doing this should change the Main Area to the image editor. Click on the first "costume" in the list, and draw something to taste.
![]()
Click on the "Sprite Layout" child item of "Sprite 0". This will take you to the layout editor, where the sprite can be be moved, rotated, and resized (resizing currently works weirdly). Editing the object inspector will allow the sprite's name to be changed, and also the start frame (costume) if there are more than one costume.
![]()
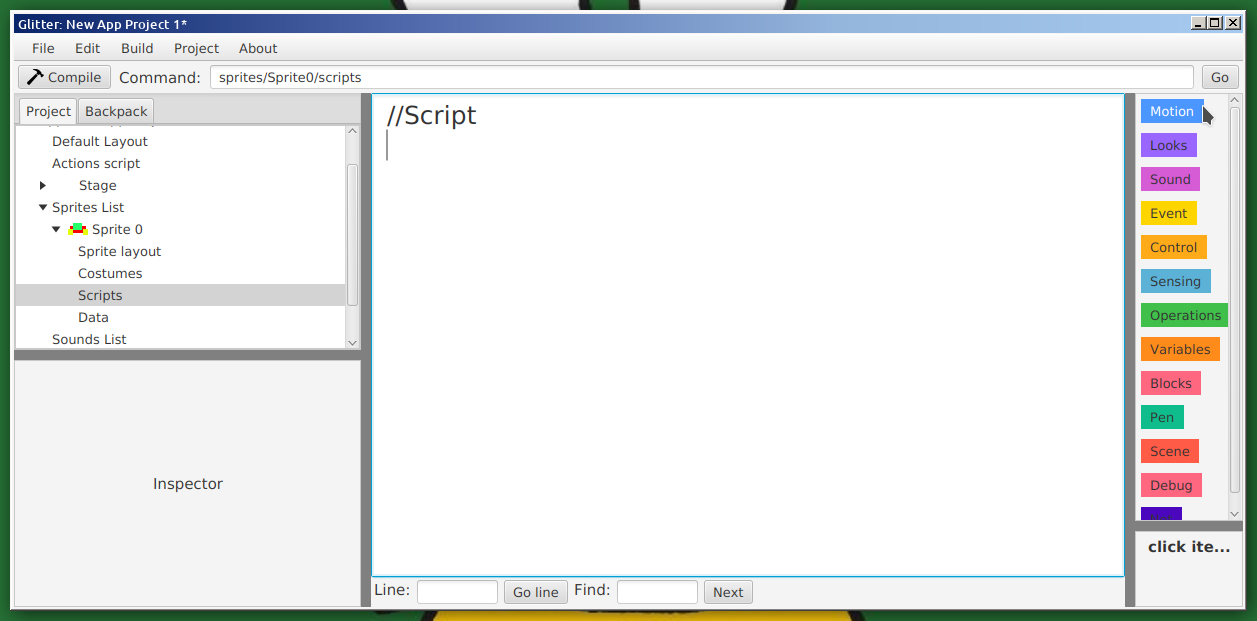
Click on the "Script" child item of "Sprite 0" to go the code editor for that sprite. The editor has a text entry area, and to the right an area to get information on various commands. Click on a coloured button to open up specific command information (the user may need to resize the various areas by clicking on the thick grey bars to resize areas - right clicking on these bars can enable swapping the sides of the bar, and switch orientation for limited customisation of the display area - this is saved automatically to a preferences file).
At the bottom of the text entry area is a few options for editing. The "Line:" box is used to go to a specific line, and the "Find:" box is used to find text. The font used in the editor can be changed from the prefences. Using "tab", and "shift tab" on highlighted blocks of code will indent and "outdent" respectively. Using "ctrl-/" will comment out/in code.
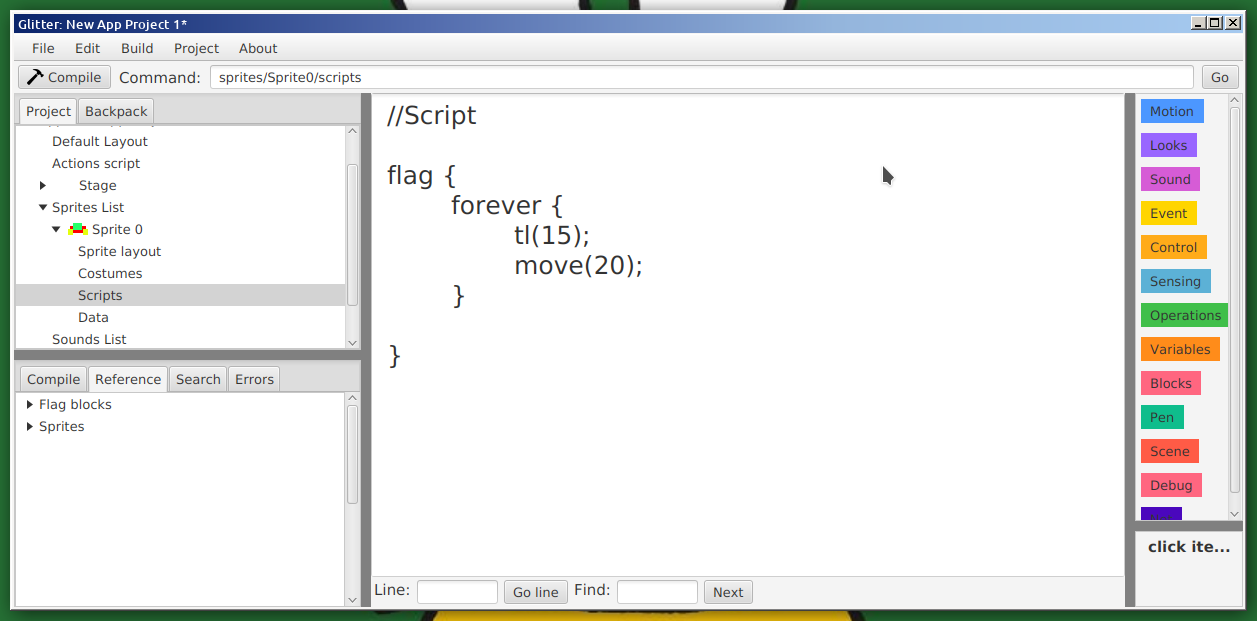
To start enter code similar to the following. This code creates a block that runs when the flag is clicked (and when the app starts depending on settings), that causes the sprite to move in a circle forever. Functions similar to the equivalent code in Scratch.
Compiling and running the app can be done in multiple ways. The first is to click on the "Compile" button in the top left. The second is to select the compile option from the "Build" menu. The third is to press "ctrl-f9".
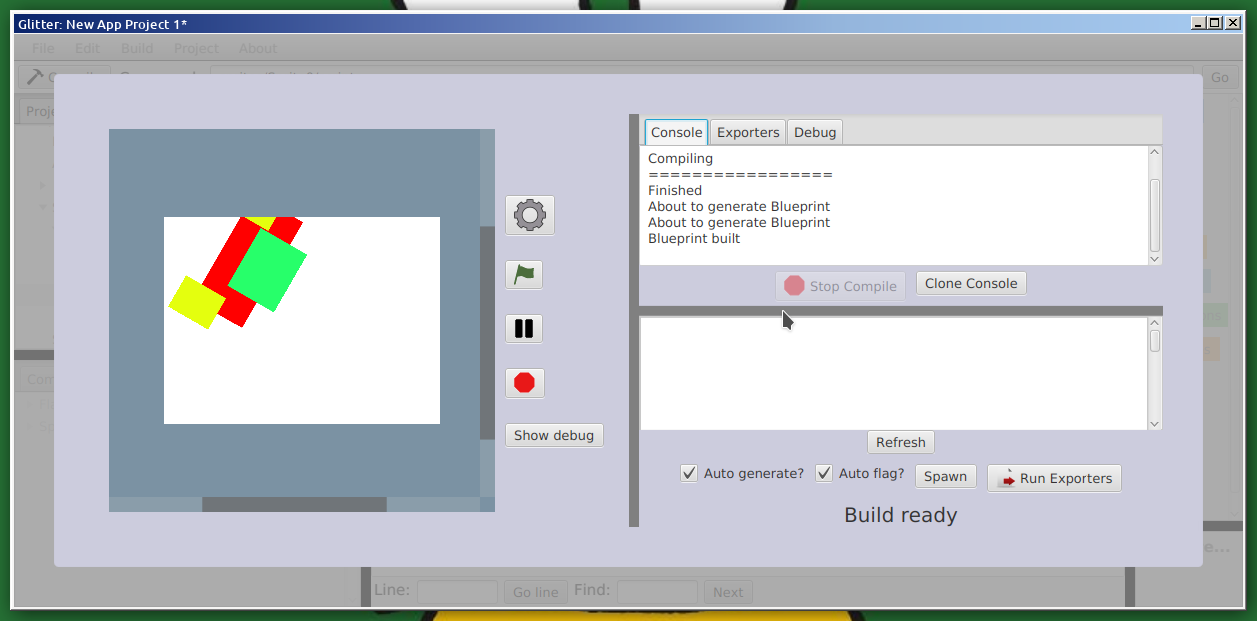
Compiling is in two steps. The first compiles the project to the "builder" code. This internal code generates the app (the "Blue print"), and from the blueprint, the editor then "runs" the blueprint code. To generate manual click the "gear" button, or click the "Auto generate?" option. To click the flag, click the flag, or select the "Auto flag?" option. (The defaults for these options can be set in the preferences".