One of the more powerful features of GlitterIDE (over Scratch) is the ability to define scenes, and to define actions. Scenes allow the user to create multiple layouts, with multiple instances of various sprites. Each scene can include specific sprites (more than once), and use a specific background. There is a specific event for when a scene starts.
Further more, sprites included in scenes can have specific actions attached to them. These actions are defined through a special script, but are used in a way that does not require coding. This framework is the start of a wider framework, where developers can write support scripts to enable other users to create games/applications with no code.
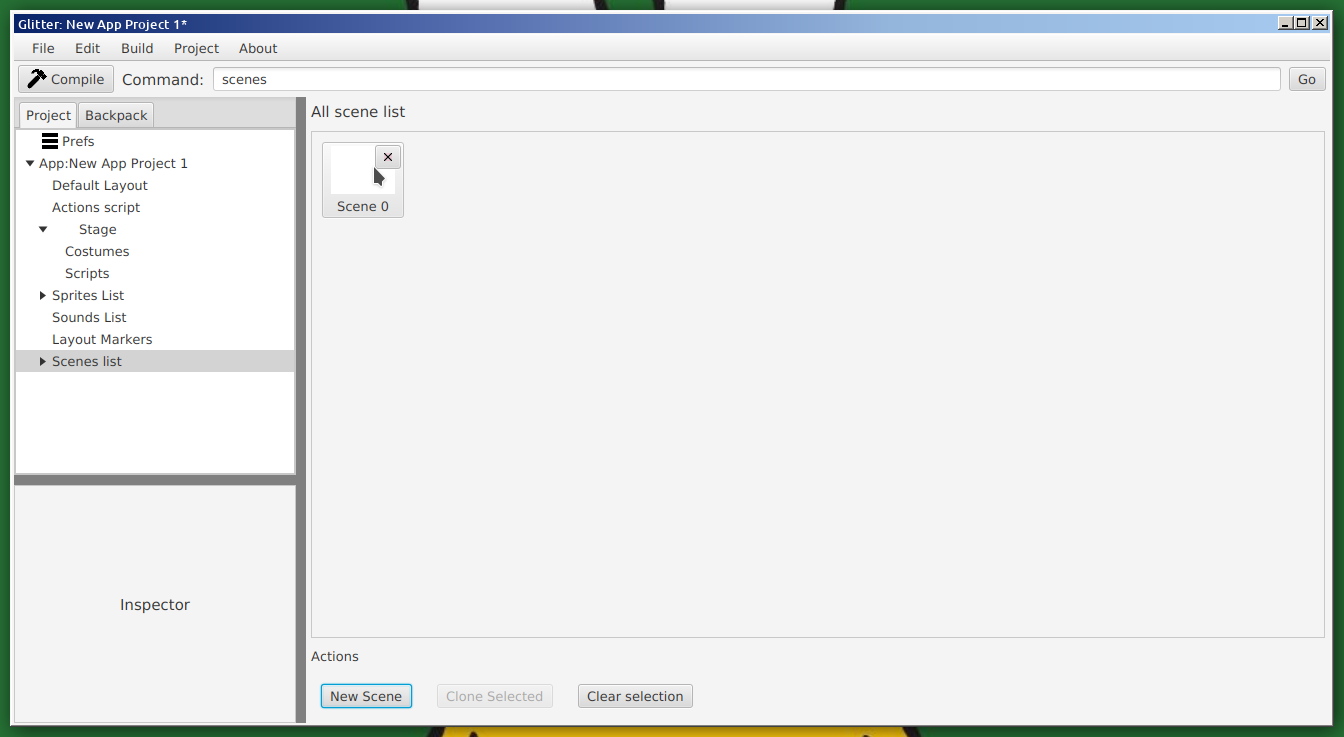
To create a scene, click on "Scenes List" in the project tree. Then from there click on "New Scene". This screen can also be used to delete scenes by click on the little "x" next to the scene icon. This marks the scene for removal - to return click the "undo" button that appears where the "x" was. (Scenes, and other objects, marked for removal are not saved).
Once a new scene has been created, the "Scenes List" node in the tree can be expanded out (click the little triangle), and the scene will be listed. Click on the specific Scene in the project tree, and various parameters will appear in the general inspector.
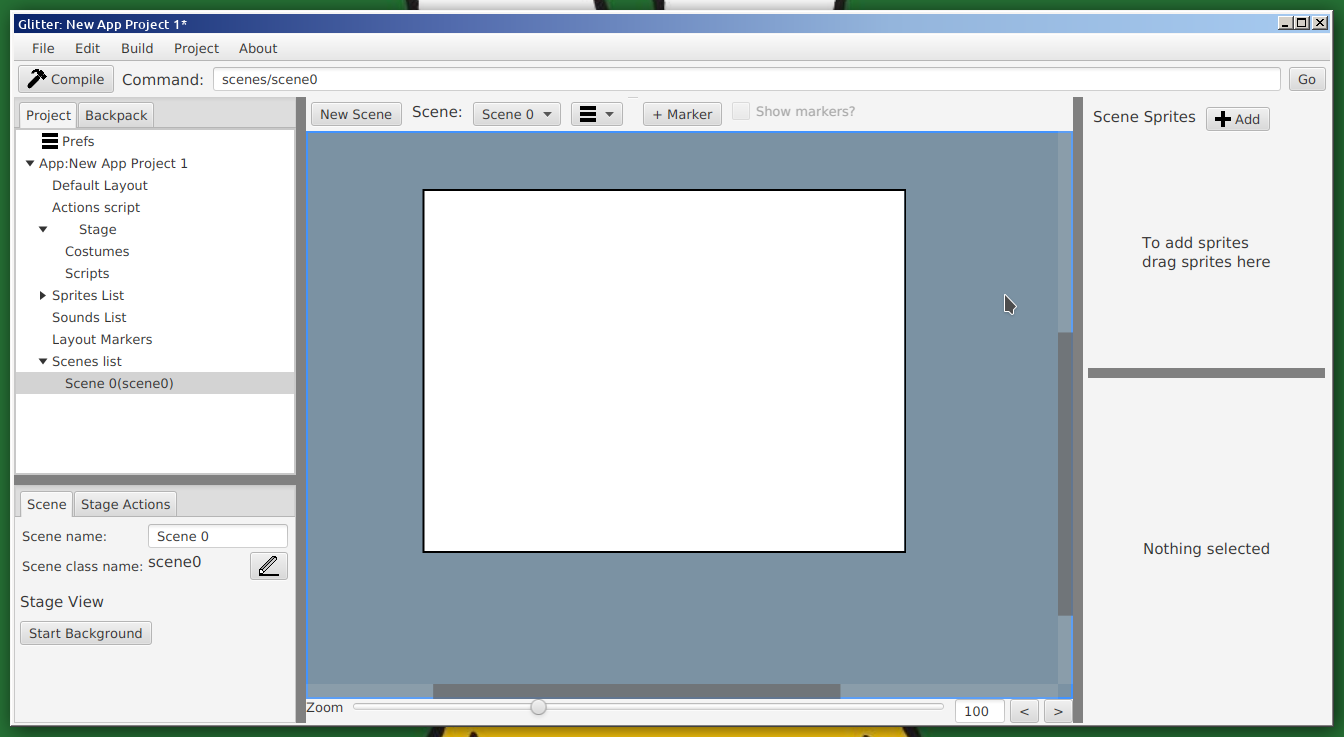
In the inspector the Scene title can be changed (only used for user reference) as wll as the scene class name. The class name is used to refer to the scene in script code, so it is important. Like all class/variable names is must only contain letters and numbers (not starting with a number), and have no spaces.
Click "Start Background" to check the scenes initial background. (Note that some of the text in this example may differ from the initial release of GlitterIDE as they were fixed/changed after release).
Once a scene has been created and the user has clicked on the scene in the project tree, sprites can be added. There are two ways to add sprites, and one way that does not work yet. The two working ways require the user to open up the "sprites List" on the project tree, and click and hold a desired sprite. This sprite can either be dragged directly onto the scene layout, or on to the Scene Sprites panel on the side of the scene layout area. Alternatively, clicking on the "+ Add" button will bring up a list of all sprites, and the sprite to be added can be selected.
Once a sprite has been added, it can be moved around and laid out like with the default layout editor.
Multiple versions of the same sprite may be added to a scene.
Clicking on a sprite will bring up its details in the side panel of the layout editor. Here the inscene name (for user reference), general details, and start frame can be set.
Once a scene has been defined, it can be used within scripts. To move to a scene, the "goto" command is used. If a scene has been defined, with the class name "Title", to following code, for example, could be used to shift to that scene:
      flag {
			waitTime(3); // wait 3 seconds
			goto Title;
	  }
The above code, when the flag is clicked, waits 3 seconds, and then "goes" to the Title scene. Moving to a scene means to reset the screen such that it is set up as described in the scene layout. The order of events is roughly as follows:
Note, the current version does not clear the pen canvas. If the pen has been used, it should be cleared before issuing the "goto" command.
By default, when the app is run, it will start in the default layout. If you wish the app to start in a particular scene (and to go back to that scene when the "green flag" is clicked), the start scene needs to be set in the "Project Details". Click on the project root node, in the project tree, to get access to the "Project Details", and then choose the desired start scene from the associated dropdown menu.

Scenes are not just used to layout sprites. Objects may also have events attached to the starting of a scene. To set up an event based on moving to a scene, the "start Scene { }" event is used. This is similar to clicked, key, message, and flag events. For example:
      start Title {
		  print("We are in the title now!");
	  }
There are differences with how this is handled between environments, with regards to sprites and their clones. In Scratch exported projects, the start event for a sprite will occur for all instances of a sprite (the original and the clone), but this may not be the behaviour in the internal runner and html export.It is not recommended to use scene start events on sprites, just the stage. (Future versions of GlitterIDE will allow specific scripts for each instance of a sprite in a scene, for more fine grained control).
Note, the start event blocks can occur and run in sprites that are not in a scene, but this behaviour may change in future releases (in particular for non-Scratch targets), so it is not recommended.
The real power of scene comes from being able to define actions to be used by sprites in the scene. This framework is meant to be one way of allowing "no code" applications in GlitterIDE. The first part of using actions is to define them. Later version of GlitterIDE will have specific library support, so action (and other behaviour details) can be defined in a separate library, that a project can use, but for now they are just defined in the Actions script.
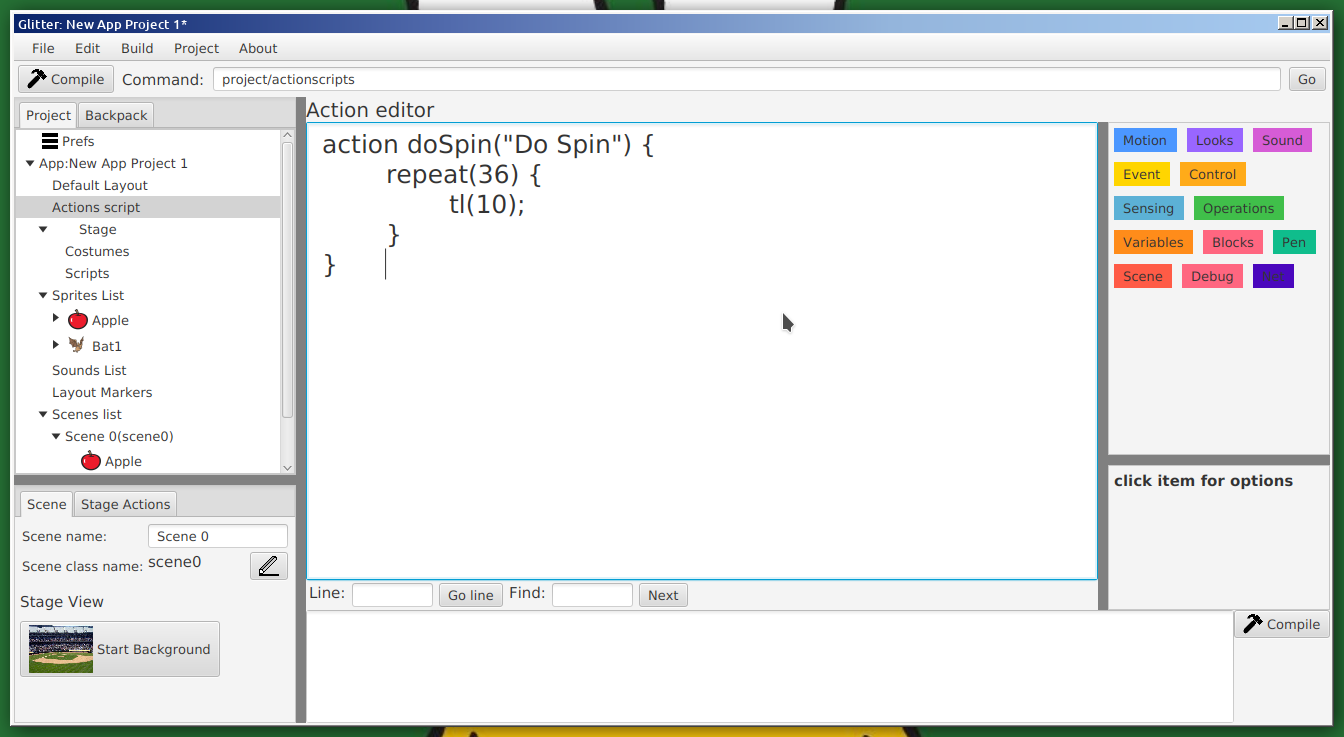
To edit the project's actions, click on "Actions Script" in the project tree. This brings up the "Action Editor", which functions like the normal script editor. The only difference is the addition of a little "compile" button for just compiling the actions ("ctrl+F12" can also be used to compile the actions).
The syntax for actions is similar to normal scripts blocks, except they are defined using the "action" keyword. An action can take a number of parameters, plus additional strings to customise their representation (see below).
A simple example is the following:
		action doSpin("Do Spin") {
			repeat(36) {
				tl(10);
			}
		}
The above example defines an action called "doSpin", that takes no parameters but does specify its representation to use the text "Do Spin". Without that, it would be represented as "doSpin". A more complex action could be:
		action simpleMove("Movement - forward speed:", int forwardSpeed, " and turn speed:", int turnSpeed=10) {
			forever {
				if(keyPressed("left")) {
					turnLeft(turnSpeed);
				}
				if(keyPressed("right")) {
					turnRight(turnSpeed);
				}
				if(keyPressed("up")) {
					move(forwardSpeed);
				}
			}
		}
In the above example a simple movement action is created to allow a sprite to move with the cursor keys, with given movement speeds. The text "Movement - forward speed:", and " and turn speed:", are used to aid the representation, and the "int forwardSpeed", and "int turnSpeed" indicate the parameters to the action (that the user supplies). The "=10" in "int turnSpeed=10" is to indicate the default value for the action.
The current Action framework is more a proof of concept. Future versions of GlitterIDE will have action definition as part as separate libraries. The current framework requires the Action script to be compiled for changes to be visible to other parts of GlitterIDE. Action scripts are compiled when the app is compiled (ctrl-f9), but can also be compiled by clicking on the "compile" button in the Action script editor, or by using the menu option (or the short cut ctrl-f12). Once compiled successfully, they can be attatched to objects in scenes.
With regard to the parameters to an Action block, there are text labels (just text in quotes), used for informing the user, and specific parameters, similar to what is used in blocks. Default values can be provided. There are currently only a small number of valid types for parameters. They are:
When using the type "scene" for an action block, this variable can be used with the goto command. For example:
		action goScene("Go scene:", scene target) {
			goto target;
		}
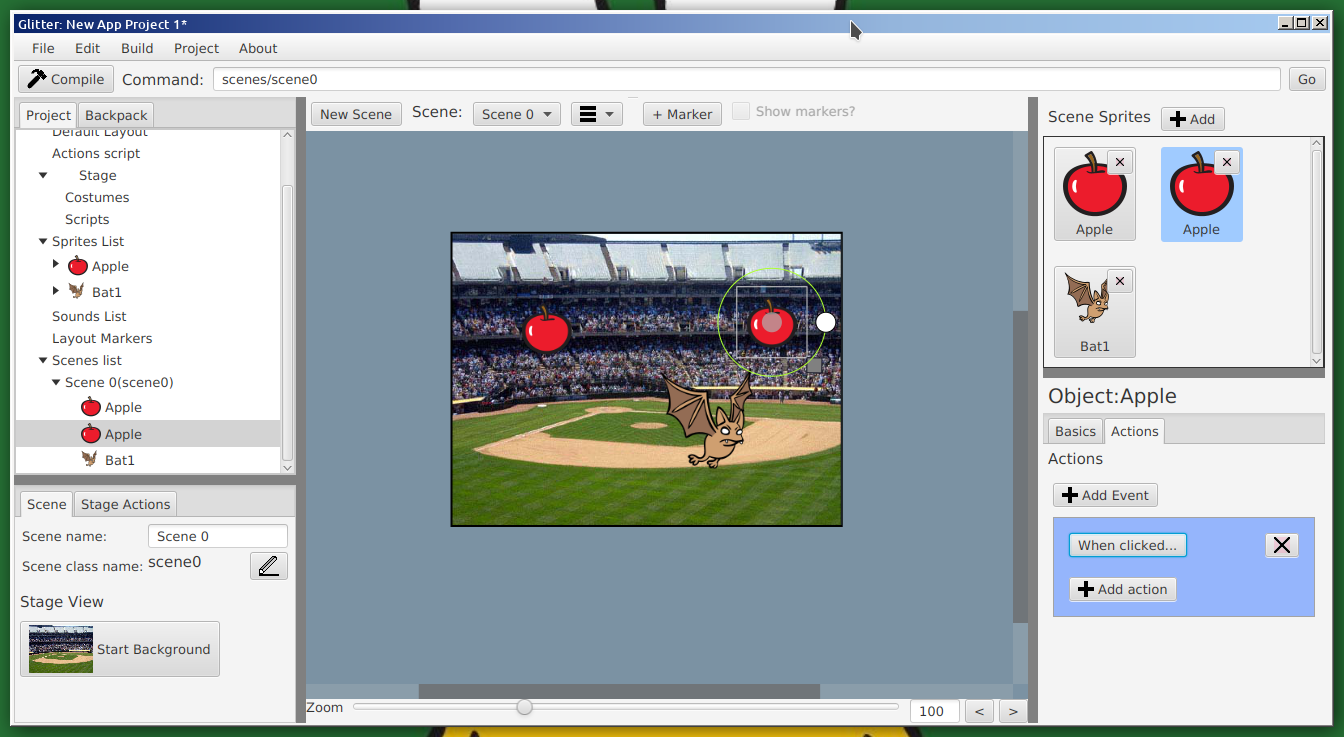
Once actions have been defined, they can be added to instances of sprites in a scene. To do this select first the target sprite, and then select the "Actions" tab on the object inspector (in general, to the right of the window, and at the bottom). The Object Inspector has two tabs, "Basics", and "Actions".
Actions are attached to an event, so the first thing to do is to add an event. Once the Actions tab is selected, the user can click on the "+ Add Event" button.
Once an event has been added, the specifics of the event need to be set. Click on the "When ?..." button to select the event type. There are currently two types of events. The first is when the scene starts ("On Scene Start"), and the second is when the sprite is clicked ("On Clicked"). The user can select one or both of these event types.
On choosing "On Clicked" (followed by "Update"), the display should look similar to the following:
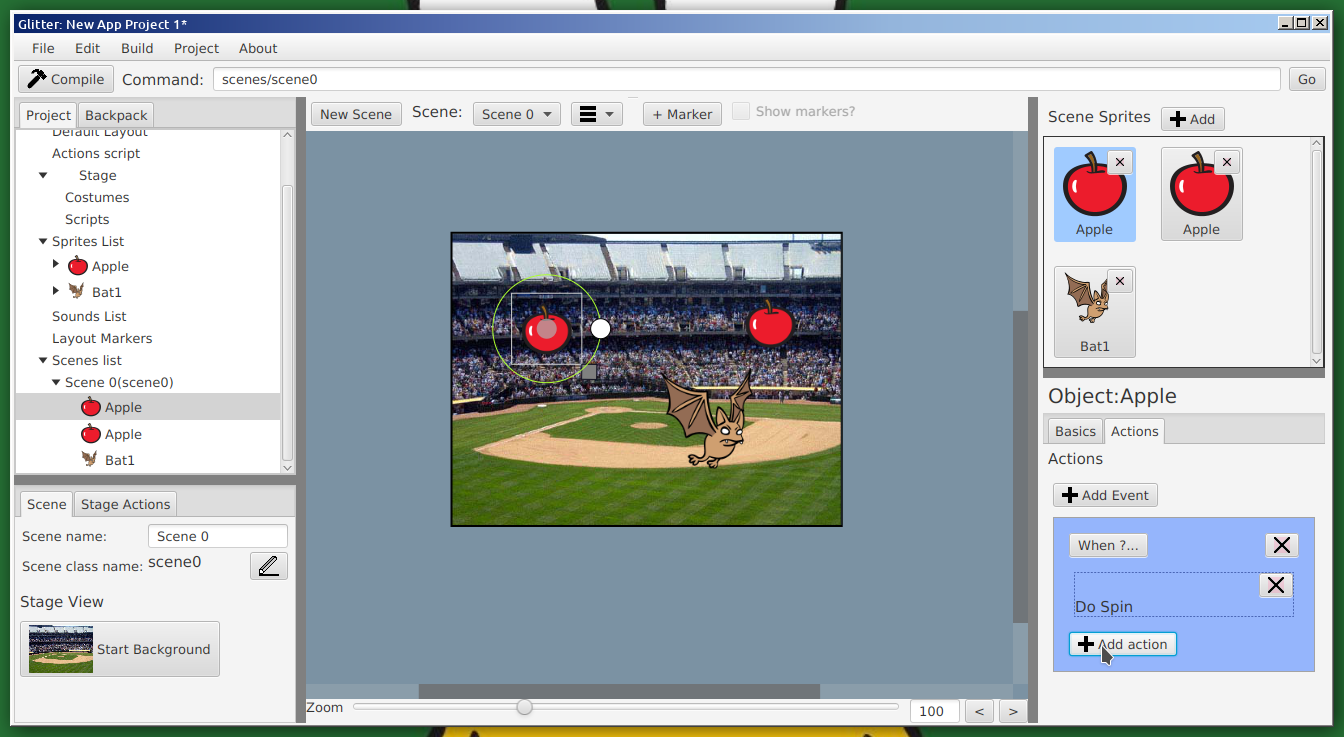
Once the event is set up the click on the "+ Add Action", to bring up the action selection.

Once an action has been selected it will appear inside the event block (in a very rough and ready GUI representation - things will look better in the future).
Adding an action with more complicated inputs will introduce GUI elements to specify those inputs.

Action inputs can, in the case of numbers and strings, be expression inputs. That is, they may be, for example a simple number, or they may be a more complex expression involving function calls, and references to the related sprite's variables. This is always the case with numerical inputs, but has to be selected with string inputs. With a string input there is a checkbox marked "Exp". If this is not clicked the input is taken as the literal string for that input, but if the checkbox is selected, the input will be evaluated as code.
A single instance of a sprite may have multiple events, and a single event may have multiple actions. It should be noted though that actions for a particular event are handled sequentually. The second action only happens when the first action has completed, and if the first action does not finish, the second action will never happen. To get multiple actions to happen at the same time, add multiple events of the same time with different actions.
If there is an error in the action input, when the app is compiled errors will be generated. Exit the compile screen (press "Escape", or click outside of the compile area), and click on the error in the general inspector in order to jump to the offending action input. Errors only occur when the given input can take an expression, and that expression is invalid. For example, if the input is a number, and the value provided is "1+spriteX/thing", an error will occur if that sprite does not have a "thing" variable.